Please note that this sequence is designed to relieve everyday aches and pains associated with the lower back muscles, for example from sitting down too long, posture, carrying children around etc. It is NOT intended for people with back injuries, SI joint dysfunction, disc compression, or recently herniated discs and some of the movements may make those conditions worse.
These movements are based on the therapeutic teachings of Gary Kraftsow.
These movements are based on the therapeutic teachings of Gary Kraftsow.
1. Opposite arm & leg stretch: stretches the lower back one side at a time

Begin lying on your back. Warm up by hugging your knees to your chest and breathing deeply in and out through the nose.
Exhale, release your hands to the floor. Inhale, raise your left leg towards the ceiling while stretching the right arm all the way behind you. Exhale, come back to the starting position. Inhale, raise your right leg and stretch your left arm. Repeat 4-6x on each side.
Tips: It doesn’t matter if your leg isn’t straight or your arm doesn’t touch the floor behind you. Just find a stretch that feels good and move in synch with your breath.
2. Cat & Cow: releases the lower back & the pelvis

Come onto all fours. As you exhale, tuck your tailbone under and round the lower back up towards the ceiling. Start the movement at the pelvis and let it travel all the way up your spine to your neck. Then as you inhale, drop your lower back down towards the floor and arch the spine in the other direction. Focus on moving in synch with your breath and on staying within a range of movement that feels good to you and is not too extreme.
Tip: Place some padding under the knees and under the hands to reduce stress on your joints.
3. Hero/Child: strengthens the lower back & releases the hips

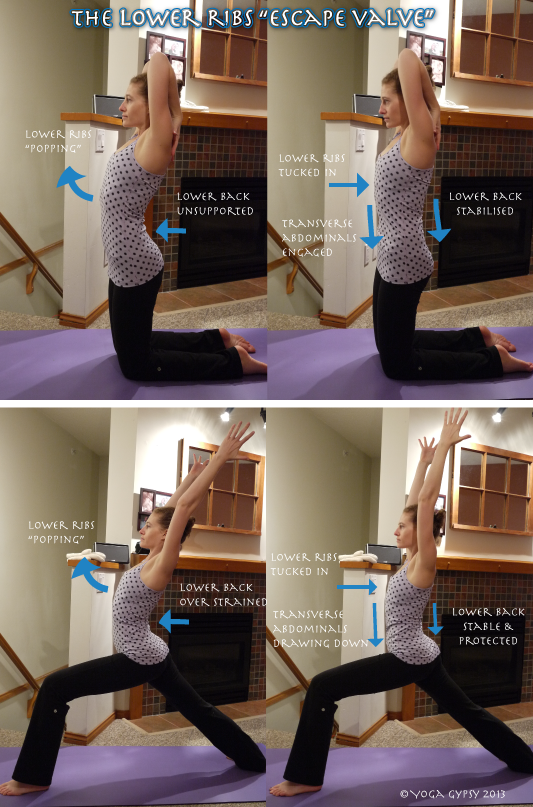
After cat/cow, leave your hands where they are and stretch your hips/buttocks back towards your heels. This is child’s pose. Exhale here, then inhale rise up onto your knees and reach both arms up, keeping the arms even with your ears as you come up. Exhale, come back down, still with straight arms.
Tip: Place some padding under the knees. You can also place a rolled up towel over your heels to pad your hips as you come down.
Make it easier: Do only one arm at a time, resting the other arm on the lower back.
4. Gate pose: stretches the muscles either side of the lower back

Still on your knees, step the right foot out to the side. Turn the right foot forward. Take a gentle sideways bend by inching your right hand down your right leg. Find a stretch you can comfortably hold. Then, inhale and reach your left hand up and back. Exhale, look towards your right foot and stretch your left arm over your ear. Repeat 3x, and on the 3rd time hold the second position for about 30seconds. Then do the other side.
When you are done, take child’s pose.
Tip: Place some padding under the knee that is on the ground. Use the right hand as a stabiliser only and try not to put too much weight on it. Don’t put the right hand directly on the knee – keep it either just above or just below.
5: Cobra/half cobra: strengthens the lower back muscles with support from the arms
Don’t do any of these poses if you feel a pinching sensation in your lower back!

Variation 1: Come to lie on your belly with your feet slightly apart. Place your palms underneath your shoulders, keeping your elbows close by your sides. Exhale fully, and as you inhale, lift your upper chest off the floor. Press your palms into the floor but – this is very important! – don’t push with your hands. They are only there for support. Exhale, come back down. Repeat 3x.

Variation 2: If Variation 1 felt totally OK, try adding a movement with the legs. As you inhale your chest up, bend the one knee and lift the foot towards your body. Exhale to come down. Repeat 3x with each foot.

Variation 3: If Variations 1 and 2 felt totally OK, try bending both knees as you lift up. Repeat 3x.
When you are done, take child’s pose.
Tips: Keep your belly and lower ribs on the floor – only the upper chest comes up. Press the tops of your feet into the floor to ground your legs as you lift up the chest. Keep your elbows by your sides and squeeze your shoulder blades together on your back. Keep your neck long.
Make it easier: If you feel pinching or compression in your lower back, spread the feet wider apart. Also, you don’t have to come up very high – just a few centimetres is plenty!
6: Half parsvottanasana: strengthens and releases the lower back, one side at a time

Come to standing (if you like, by coming through downward facing dog). Stand with your feet hip width apart or a bit wider. Then step your right foot forward and your left foot back, so you feet end up about a leg’s length apart. Place your right hand on your lower back, palm facing away from you. As you inhale, raise your left arm in the air. Exhale and bring your left hand towards your right foot, keeping the arm long as you come down. Inhale, come halfway up. Exhale, come all the way down. Inhale, come all the way back up. That is one round.
Do 3 rounds on each side. Remember that the raised arm is the opposite of the forward foot.
Tips: You want your hips to be squared towards the front. The wider apart your feet are (sideways, not front-to-back) the easier this will be. Try to turn the back toes as far forward as you can to get your hips even more square. Try to make sure the arm stays even with your ear as you are coming up and down.
Make it easier: Don’t try to come all the way to the floor. Place a yoga block or some books next to your front foot and bring your hand down onto those. Or, place a chair in front of you and bring your hand down onto the chair. When you inhale halfway back up, just make it half the distance you came down.
7: Pigeon: releases the psoas muscles

From standing, come back down to the floor. Bend the right knee and place it near the front of your mat, then slowly stretch your left leg out behind you. The right toes should be underneath or just to the side of your groin. Place your hands either side of the right knee.
As you inhale, lengthen your spine by pressing your hands (or fingertips) firmly into the ground and stretching up through the crown of your head. As you exhale, extend forwards over the bent knee. You don't need to come too far down! Inhale, use your hands to lift you up again. Repeat 4 times and on the 4th time, stay in a prone position for about 30 seconds to a minute. Then come up and do the other side.
Tips: If you find pigeon too tough on your knees or hips, check out these 4 ways to modify pigeon pose by Anna Guest-Jelley at Curvy Yoga! These are great modifications for people of ANY shape. :) If you are OK with the basic pose but your right hip is really hanging in the air, fold up a large towel or get a firm pillow (or two, or three…), and place it underneath your right buttock. You can also put some padding in between the right heel and your body, under the right knee and under the left knee or foot.
Make it easier: There's no need to push yourself in this stretch, so only come as far down as is comfortable. You will get the same benefit by just coming some of the way down and then coming up again! You can also place a yoga block, a stack of books or a pillow beside the right knee and bring your head down onto those.
When you have done both sides, take child’s pose.
Tips: If you find pigeon too tough on your knees or hips, check out these 4 ways to modify pigeon pose by Anna Guest-Jelley at Curvy Yoga! These are great modifications for people of ANY shape. :) If you are OK with the basic pose but your right hip is really hanging in the air, fold up a large towel or get a firm pillow (or two, or three…), and place it underneath your right buttock. You can also put some padding in between the right heel and your body, under the right knee and under the left knee or foot.
Make it easier: There's no need to push yourself in this stretch, so only come as far down as is comfortable. You will get the same benefit by just coming some of the way down and then coming up again! You can also place a yoga block, a stack of books or a pillow beside the right knee and bring your head down onto those.
8: Locust: strengthens and lengthens the lower back muscles, one side at a time

Come to lie on your belly with your right arm out in front of you, palm facing upwards. Press your left palm firmly into the floor. As you inhale, lift up the right arm and the left leg. As you exhale, come down. Repeat 3 times on each side, optionally holding the 3rd lift for about 30 seconds.
When you’re done, take child’s pose.
Tip: This pose is not about height as much as about length. Really reach through the lifted fingertips and stretch through the ball of the lifted foot. Keep your neck long instead of trying to crane upwards.
Make it easier: Don’t hold the lifted position, simply come up and down with the breath. Don’t try to come high off the floor – a few centimetres is perfectly fine to get the benefit of this pose! Working against gravity is hard – be gentle on yourself!
9: Janu sirsasana: stretches the lower back, one side at a time

Sit on the floor with your left leg out straight and your right foot resting against the inside of the left thigh. As you inhale, lengthen the spine (optionally stretching your arms above the head). As you exhale, fold forwards. Repeat 4 times, on the 4th time staying in the forward fold for 30 seconds. Come up slowly and do the other side.
Tips: If the right knee doesn’t come all the way to the floor, place a folded up towel or a firm pillow underneath it. You can also pad under the back of the left knee or under the left heel.
Make it easier: If your hamstrings are tight, bend the left knee or even place a rolled up towel under the back of the knee. If your hips complain, sit up on a firm pillow, a bolster, or even a chair. The higher up your hips are, the easier it will be to fold forwards in a safe and comfortable way.
10: Paschimottanasana: stretches the lower back symmetrically

This time, sit with both your legs stretching out in front of you. As you inhale, reach the arms up above the head. As you exhale, fold forward, keeping the spine as long as you can, and finally place your palms flat on the floor. Close your eyes and breathe here for 30 seconds to 1 minute. DO NOT try to pull yourself deeper into the stretch with your hands. DO NOT rock back and forth. Just fold forward, stay there, and breathe.
Tip: Place a few pillows on top of your legs and a rolled up towel under your knees so that when you fold forward, you can rest your chest on the pillows. This makes it a deliciously relaxing pose and a wonderful supported stretch for the lower back.
Make it easier: I highly recommend sitting up on a folded towel or a pillow when you do this stretch. If you can't get comfortable in the forward fold, try placing a chair over your legs with the chair seat facing towards you, and resting your head on the chair. Alternatively, you can actually do this forward fold while sitting on a chair (with your feet hip width apart and planted firmly on the floor).
11. Bridge pose: strengthens & stretches the lower back, stretches the psoas

Come to lie on your back with your knees bent and your feet planted on the floor. The feet should be parallel to each other and about one foot’s distance from your hips (as a rough guideline, you should almost be able to reach your heels with your fingertips if your arms are stretched out straight beside your body). Walk the shouderblades together and press the back of the head into the floor, looking straight up.
As you exhale, flatten the lower back into the floor. This automatically tucks your pelvis and lengthens the back muscles. As you inhale, press your feet into the floor, keep the alignment of the pelvis (think of lifting the pubic bone towards the ceiling) and gently lift up the hips while also stretching the right arm over the head. Try not to squeeze or clench your buttocks. As you exhale, come down. Alternate right and left arms, doing each side 3 times.
When you’re done, hug your knees to your chest for at least 30 seconds.
Tip: If you have a yoga block or something equivalent (firm and stable but not too hard), you can place it under your lower back for supported bridge. This can be a wonderful release for the lower back. When you are there, relax the buttocks completely, and stay in this pose for 1 minute, slowly building to about 3 minutes. (See picture below)

Make it easier: Don’t come up very high. Place a strap or belt around your thighs to hold the thighs in alignment, relieving pressure on the lower back.
12. Easy twist: releases the lower back, one side at a time

Begin with your knees raised towards the chest. Release your arms towards the floor, stretching out to the sides. On an exhalation, release both legs towards the right-hand side. If your neck is comfortable, look away from your knees. If that’s not comfortable, look straight up. Breathe deeply. Stay 30 seconds, then come up slowly and do the other side.
Tip: To keep your back nice and long, shift your hips a bit to the left before releasing your knees to the right, and vice versa.
Make it easier: Place a folded up towel or firm pillow (or several) underneath your knees so they don’t have to come down as far.
When you’ve done the whole sequence, take savasana, final resting pose, with some support underneath the knees. A rolled up towel or a bolster will do. You can also put your lower legs on a chair. Get as comfy as you can – use an eye pillow, put on some relaxing music – and stay in savasana for at least 3 minutes. When you are ready to come out, roll first onto your side, and then gently push yourself back up to sitting.